Polylang for Translations
This guide applies to:
- Basic
- Professional
In this guide
- Introduction
- Setting up Polylang for Translations
- How to Translate Draw Attention
- Step 1: Create Your Interactive Image and Hotspots
- Step 2: Switch Language
- Step 3: Add the Main Featured Image Again (Optional)
- Step 4: Recreate Your Hotspots and Manually Translate Text
- Step 5: Viewing Interactive Images and details
- Step 6: Page/Post translation
- Step 7: Visit the Original Interactive Image
Introduction
Draw Attention is compatible with Polylang for translations; that way, you can make sure that your interactive image’s content will be translated seamlessly.
Setting up Polylang for Translations
Learn how to set up Polylang so it is ready for translation.
Step 1: Install and Activate
Before we can start translating, let’s start by installing and activating Polylang. Head on over to your WordPress Admin Dashboard > Plugins > Add New and search for Polylang. Once you’ve located it, install and activate the plugin.

Step 2: Select Languages
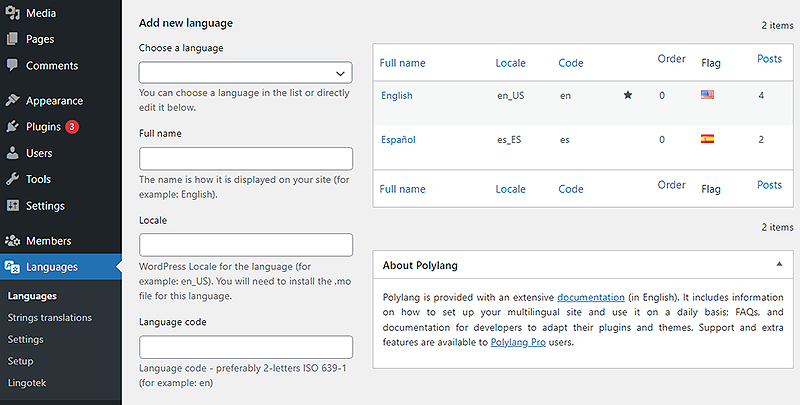
Once Polylang has been installed and activated, you will need to locate Languages on your dashboard. From here, you will select the languages that you wish to utilize, along with the original language for your site.
Step 3: Fill out Language Fields
Once you’ve chosen your language, you will need to enter the language’s full name, along with various other details, if you wish.
You will need to repeat Steps 2 – 3 for any other languages you decide to add.
Step 4: Select Default Language
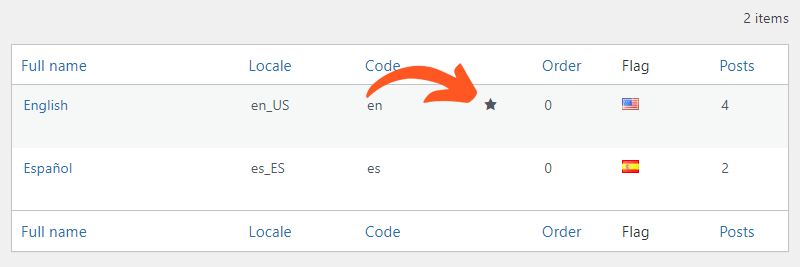
If you need to change your site’s default language, you can do so by selecting the star next to your preferred language.
Step 5: Include Draw Attention in the Custom Post Types
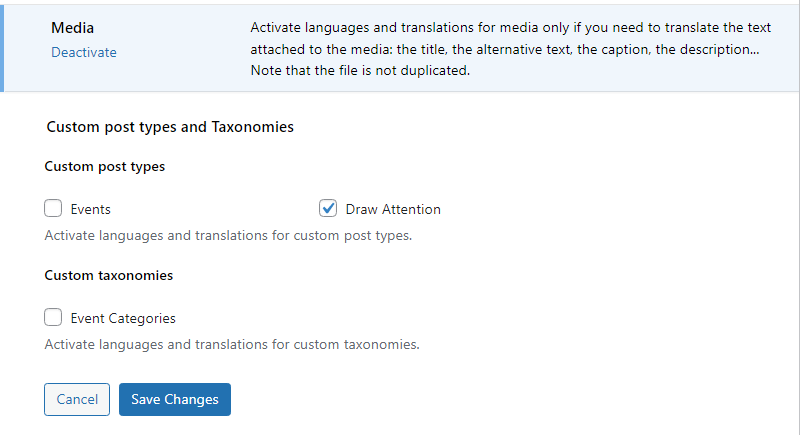
Navigate to Languages > Settings, and select the Settings for Custom Post Types and Taxonomies. Select Draw Attention from this list and Save Changes.
Step 6: Translation Widget
Head on over to your Appearance > Widgets or Appearance > Customize, and add the Language Switcher Widget to your site.
Allow your visitors to switch between languages. This will only appear when at least one interactive image has been published in that language.
This helpful guide also goes over how to set up Polylang.

How to Translate Draw Attention
Now that you’ve set up Polylang and the widget, it is time to start translating!
Step 1: Create Your Interactive Image and Hotspots
Make sure that you have created your interactive image first and that its hotspots are in the original language.
If you haven’t yet, learn how to create your first interactive image here.
Step 2: Switch Language
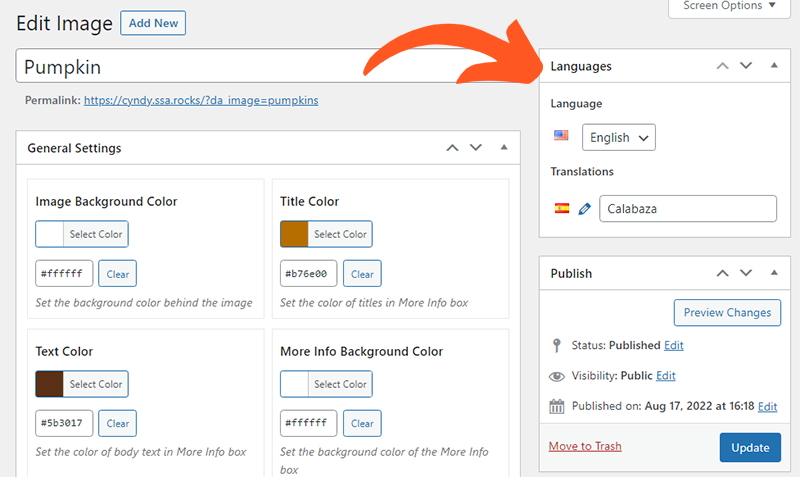
After saving your interactive image, on the right-hand side, you will see a section labeled Languages. Click the dropdown or click on “+” next to the second language and switch it to your second language.
Switching to a different language will open a new Draw Attention image editor, and all the content will need to be re-added and set up again.
Step 3: Add the Main Featured Image Again (Optional)
When you use the language switcher within the Draw Attention editor to create a translated version, the main interactive image might need to be re-added. This step mostly applies to the free Basic Edition of Draw Attention; the paid Pro version tends to hold the main featured image in place.
For that, you can either re-upload the same interactive image from your computer or add it from the media library if the image is saved in your WordPress website’s media library.
Step 4: Recreate Your Hotspots and Manually Translate Text
Publish your translated interactive image so that you can create hotspots.
Recreate your hotspots and manually translate the hotspots and their descriptions to your desired language.

Step 5: Viewing Interactive Images and details
Draw Attention Basic Edition
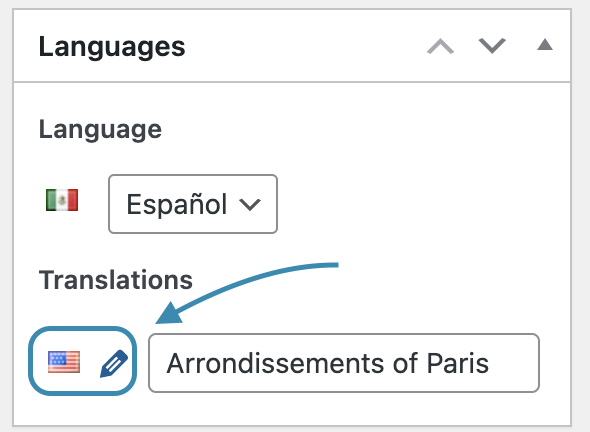
To view and switch the interactive image between different languages, you need to click on the language flags in the Languages panel within the Editor.
Since the free edition of Draw Attention only supports one interactive image at a time, you’ll need to navigate between the languages within the editor.
Draw Attention Professional Edition
With Draw Attention Pro Edition, you can view the translated versions of an interactive image by clicking on language flags or from the Draw Attention Images list, which can be accessed via WP-Admin > Draw Attention > All Images.

Step 6: Page/Post translation
Polylang creates duplicates for translated posts, pages, etc.; you need to make sure that you create a translated version of the page on which you embed the translated version of the interactive image.
The Draw Attention module or shortcode will need to be added to each translated post separately. Draw Attention will automatically detect the page language and display the corresponding interactive image.
Step 7: Visit the Original Interactive Image
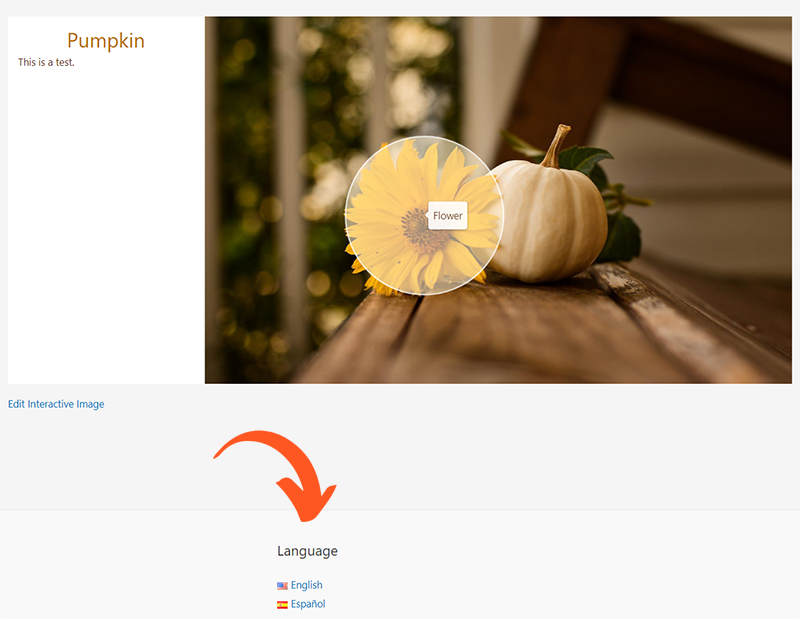
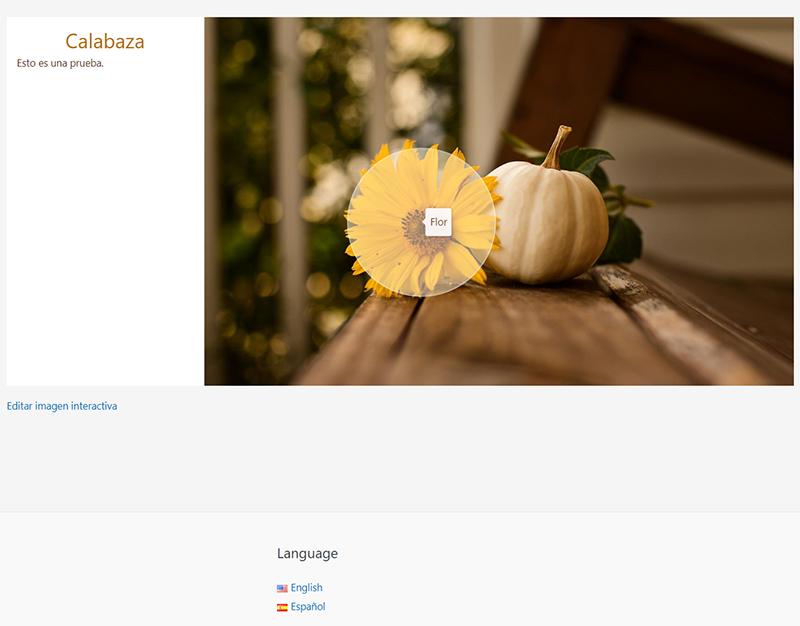
Visit your original interactive image and scroll to where the Language Switcher widget is embedded. Click the alternate translation to view the interactive image in that language.
Example: English
Example: Translated to Spanish
Related Guides
-

Complex Hotspot Content
-

FooGallery for Embedding Galleries
-

WPML For Translations
-

Slide Anything Plugin